Although the IRender nXt Render Ready Components includes a variety
of light fixtures, it's frequently necessary to create your own Render
Ready Component for your SketchUp model. There are so many lamp designs
already available from the 3D Warehouse that looking there first is a
good place to start.
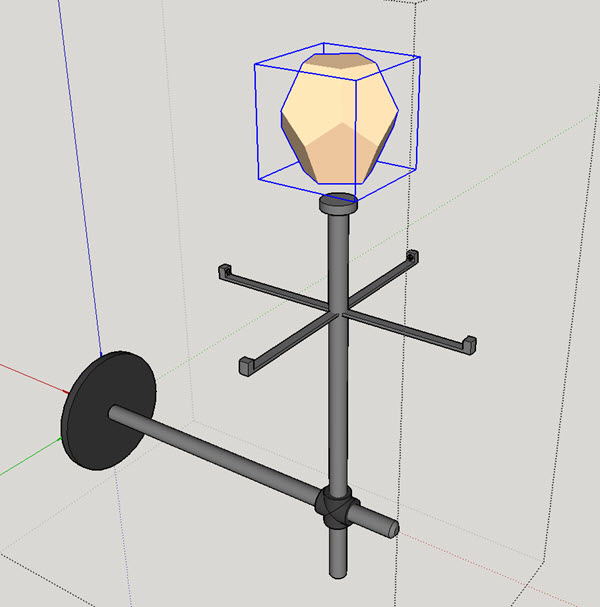
This fixture is not IRender Ready, but making it so is not difficult.
First, I'm going to hide the lamp shade to make it easier to add an IRender nXt bulb.
The lamp does include a component for the bulb, but this component is not a light source, so I'm going to remove it.
IRender
nXt includes several bulb types including Point (an omni directional
light source), Spot, and Beam. For this fixture, a Point light is
appropriate
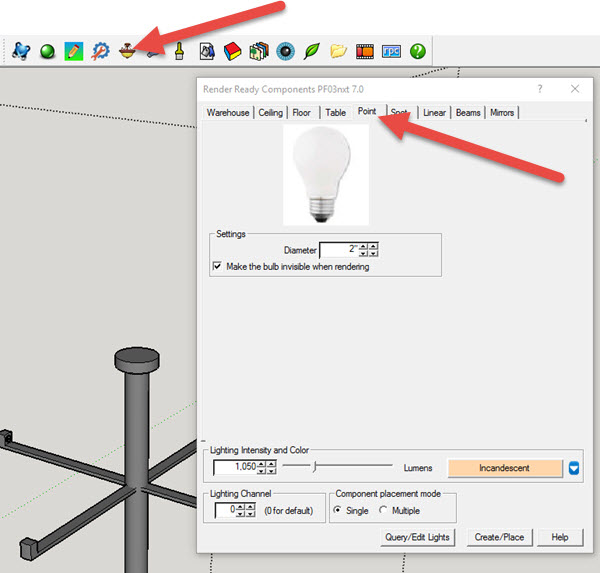
Before
adding a bulb to the model, review and set the options to match the
actual lamp you're modeling. When you CLICK "Create/Place" and add the
bulb to the model, take a little time to adjust the position.
The
lampshade is a burlap style and I want to make a few changes so that it
will render properly. "Right-Click" on the shade and select "IRender
nXt" > "Edit Material..."
The Presets tab on the Edit Material dialog includes "Shade" - render settings that are intended for lamp shades.
The preset values for Shade are available on the Trans tab.
Transparency is set to 50, so 50% of the light produced by the bulb will get through this material.
Transluscency is set to 1, so anything behind the material will not be clearly visible.
For a detailed description with a few examples on the rendering
behavior of Transparency and Translucency, read this Render Plus
Article
Here's the new light fixture included in a rendering:
The
most efficient way to make a new light fixture, or to make a component
downloaded from the 3D Warehouse IRender Ready, is to modify the
component and add a bulb or bulbs from the IRender nXt library.